Many homeowners seek practical ways to upgrade their windows without major renovations. Intelligent smart film offers a modern solution for those who value enhanced privacy, energy savings, and sleek aesthetics. People often choose this DIY installation because it allows them to enjoy benefits such as:
●Privacy control at the touch of a button
●Improved energy efficiency, with studies showing savings on energy bills
●A stylish look without bulky curtains or blinds
●An affordable alternative to professional installation
Following clear steps can help anyone achieve a smooth, professional finish.
Key Takeaways
●Intelligent smart film enhances privacy and energy efficiency, offering a stylish alternative to traditional window treatments.
●DIY installation is accessible with common household tools, making it a cost-effective option for homeowners.
●Accurate measurements and thorough cleaning are crucial for a successful installation, ensuring a smooth and professional finish.
●Testing the smart film after installation helps confirm proper function and identify any issues early.
●Regular maintenance, including cleaning and inspections, extends the lifespan and performance of smart film.
Tools and Materials for Smart Film Installation
Essential Tools for Installation
Smart film installation does not require specialized equipment. Most households already possess the necessary tools, making the process accessible for anyone interested in a DIY installation. Homeowners can find any missing items at local home improvement stores. The following tools help ensure a smooth and professional result:
●Plastic scraper
●Dust-free cloth
●Small hand squeegee (tendon scraper)
●Nitrile gloves
Isopropyl alcohol●Neutral silicon sealant (such as Toshiba 381 GE83)
●Box cutter
Smart film is designed to be installation-friendly. Homeowners do not need to hire professionals or purchase expensive tools. This simplicity allows anyone to complete a DIY project with confidence.
Materials Checklist
A successful smart film installation depends on careful preparation and the right materials. The table below outlines the essential materials and conditions for the process:
| Material/Condition | Description |
|---|
| Clean Environment | Essential for a smooth Smart Film surface and flawless final result. |
| Good Lighting | Important for spotting dust, aligning the film, and identifying air bubbles. |
| Isopropyl Alcohol | Required for cleaning the surface before applying the Smart Film. |
| Patience | Necessary for a successful installation process. |
| Careful Handling | Smart Film is delicate; it should be kept flat and straight during handling. |
Homeowners should avoid handling the material around the wiring to prevent breaking the connection. Cleaning the surface with isopropyl alcohol ensures optimal adhesion. Removing the protective coating from the contact side before installation is crucial.
Smart film can retrofit existing glass without replacement. This feature makes it a practical and budget-friendly choice for various applications. Homeowners can easily add smart tint functionality, increasing the feasibility of DIY projects. The straightforward installation process eliminates the need for specialized services, making smart film accessible for everyone.
Preparing Windows for Intelligent Smart Film
Measuring and Cutting Smart Film
Accurate measurements play a crucial role in achieving a seamless smart film installation. He should start by measuring the width and height of the windows using a reliable tape measure. They must record the dimensions carefully, double-checking each value to avoid errors. Smart film needs to fit precisely, so leaving a 2-3 millimeter margin on each side prevents overlap and ensures a clean edge. She can mark the film with a pencil or masking tape before cutting. Using a sharp box cutter, he should cut along the marked lines, keeping the film flat and steady. This method reduces the risk of jagged edges and helps the film adhere smoothly to the glass. (But recommend measuring the correct size to the supplier; try to avoid cutting it yourself.)
Cleaning and Inspecting Glass
A spotless glass surface guarantees optimal adhesion and a flawless finish. They should follow a systematic cleaning routine to prepare the windows:
1. Begin with a deep cleaning using a specialized solution designed for glass.
2. Scrub the surface with dust-free wipes to remove dirt, grease, and residue.
3. Use a glass scraper to eliminate stubborn contaminants such as paint overspray, tree sap, or sticker residue.
4. Clean the glass again to remove any loose particles.
5. Clean the surrounding area to minimize dust contamination during installation.
6. Protect nearby surfaces to prevent accidental spills or scratches.
He should inspect the glass for chips, cracks, or imperfections. Any damage may affect the film’s performance and appearance. She must ensure the environment remains dust-free throughout the process. Clean windows and glass surfaces allow the smart film to bond securely, resulting in a professional look.
Step-by-Step Smart Film Installation
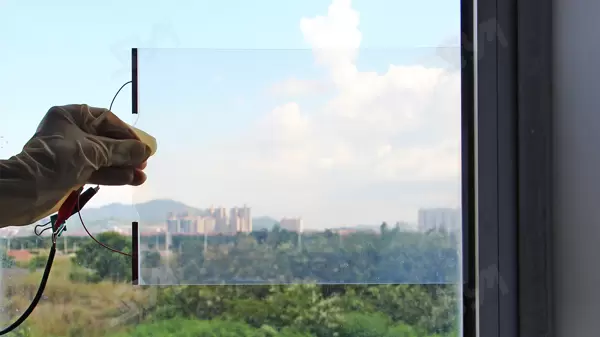
Positioning and Aligning the Film
Accurate positioning forms the foundation of a successful intelligent smart film installation. He should begin by ensuring the glass surface is spotless and dry. Any dust or residue can cause bubbles or poor adhesion. Good lighting helps him spot imperfections and align the film precisely. Temperature control also matters. The installer should keep the room and glass at a stable temperature to prevent the film from becoming too rigid or too soft.
The following table outlines the recommended process for positioning and aligning intelligent smart film on windows:
| Step | Purpose | Key Considerations |
|---|
| Thorough Cleaning | Remove contaminants for optimal adhesion | Use specialized solutions and dust-free cloths |
| Surface Inspection | Identify imperfections or structural issues | Address flaws before film application |
| Temperature Control | Ensure suitable application conditions | Maintain optimal ambient and surface temperature |
| Digital Templating | Create an accurate template for cutting | Use 3D scanning or digital measurement tools |
| Strategic Pre-Cutting | Enable controlled stretching over the curve | Account for curvature and installer’s margin |
| Gradual Film Positioning | Prevent premature adhesion or bubbles | Apply film gently, adjust position as needed |
| Systematic Squeegee Technique | Eliminate air bubbles, ensure full contact | Use a silicone squeegee, work from the center outward |
He should use a tape measure and digital tools if available, to create a template for the smart film. This step ensures the film fits the window perfectly. Before applying, he must peel back 20–30mm (about 1 inch) of the adhesive side’s protective layer. This small section allows him to anchor the film at the top edge of the glass without exposing the entire adhesive surface to dust.
For larger windows, two people should work together. One person can hold the film while the other aligns and presses it into place. This teamwork reduces the risk of misalignment and creases.
Applying and Smoothing the Film
Applying intelligent smart film requires patience and attention to detail. He should start at the top of the glass, slowly pressing the exposed adhesive section onto the surface. He must check alignment before proceeding. Gradually, he should peel away the protective layer in small increments (about 3 inches at a time), pressing the film onto the glass as he goes.
To avoid air bubbles and wrinkles, he should use a silicone squeegee. Starting from the center, he should work outward in smooth, overlapping strokes. This technique pushes trapped air toward the edges. Even pressure is important. Too much force can stretch or tear the film, while too little leaves bubbles behind.
The table below summarizes the most effective techniques for smoothing smart film:
| Technique | Description |
|---|
| Surface Preparation | Clean the glass thoroughly to remove contaminants. |
| Dry Sticking | Dry installation only. |
| Controlled Squeegee Pressure | Apply even pressure from the center outward to remove bubbles. |
| Proper Lighting | Ensure good lighting to spot hidden bubbles or imperfections. |
| Temperature Control | Maintain a stable environment for the best results. |
He should trim any excess film along the window edges with a sharp ceramic blade. This step creates a clean, professional finish. If he notices bubbles after application, he can gently lift the film and reapply that section, smoothing it again with the squeegee.
Connecting Electrical Components
Intelligent smart film transforms from opaque to clear when powered. Proper wiring is essential for safe and effective operation. He should read the manufacturer’s instructions carefully, as wiring requirements can vary between brands and models.
For a standard DIY installation on residential windows, he can usually connect the smart film to a transformer and plug it into a standard outlet. Some systems allow control through a smartphone app. If he installs multiple panels, he can wire them together to operate with one transformer, controlling up to 100 square feet of film.
The table below summarizes common scenarios for connecting electrical components:
| Installation Scenario | Instructions |
|---|
| DIY Installation for Small Projects | Two people recommended; follow the wiring instructions closely. |
| Larger Projects | A professional electrician is required for wiring. |
| General Electrical Setup | Plug smart film into a power outlet; control via switch or app. |
| Wiring for Multiple Panels | Connect panels to one transformer for unified control. |
He should avoid handling the wiring directly or bending the film near the connectors. For safety, he must ensure the power is off before making any connections. After wiring, he can test the smart film by switching it on and off to confirm proper function.
By following these steps, anyone can achieve a professional result when installing smart film. The process for installing smart film on windows typically takes one to two hours per standard window. With careful preparation and attention to detail, DIY enthusiasts can enjoy the benefits of intelligent smart film in their homes.
Testing and Maintaining Smart Film
Testing the Installation
After completing the installation, he should test the smart film to confirm proper function. The following steps help verify performance:
●Switch the film on and off using the control system.
●Observe the transparency levels when powered.
●Check the opacity levels when the film is off.
He should repeat these steps for each window. Consistent results indicate successful installation. If the film does not respond or shows uneven clarity, he should review the wiring and connections.
Troubleshooting Common Issues
Smart film installation sometimes presents challenges. He may encounter air bubbles, peeling edges, or electrical malfunctions. The table below outlines common problems and solutions:
| Common Issues | Troubleshooting Steps |
|---|
| Improper preparation | Cut the film to the correct size and remove protective films before installation. |
| Air bubbles | Use a squeegee to push bubbles out; patch air holes promptly for proper adhesion. |
| Non-adhering edges | Clean the glass thoroughly and ensure no contamination before applying the film. |
| Peeling | Apply high-quality glue and use even pressure during installation for optimal stickiness. |
| Electrical malfunctions | Prevent moisture exposure; check for moisture regularly to protect electrical components. |
He should always follow installation best practices, such as cleaning the glass with a lint-free cloth and using quality cleaners. If problems persist, he may need to consult a professional for further assessment.
Maintenance Tips
Regular maintenance extends the lifespan of smart film and preserves its clarity. He should clean the surface at least once a month using a soft, lint-free cloth and alcohol concentration of 75% or higher. In high-traffic or dusty environments, more frequent cleaning may be necessary. Controlling humidity between 30-50% helps maintain adhesion and prevents peeling. He should monitor electrical connections and voltage levels, as fluctuations can affect performance.
Periodic inspections by a professional every two to three years ensure the smart glass and electrical components remain in good condition. Environmental factors, such as UV light, extreme temperatures, and pollution, can impact the film’s longevity. High-quality materials and proper installation help withstand these stressors.
Installing intelligent smart film on windows follows a clear process. He or she should:
●Measure and trim the film for a precise fit.
●Test the film before installation.
●Clean and dry the glass surface.
●Apply the film carefully, avoiding bubbles.
●Test the film after installation.
Careful attention to each step ensures a professional result. Readers often ask about durability, discoloration, and delamination. He or she can share experiences or ask questions for further guidance.
FAQ
How long does Smart Film last on windows?
Smart film usually lasts eight to ten years with proper care. He or she should clean the film regularly and avoid harsh chemicals. Periodic inspections help maintain performance and appearance.
Can smart film be installed on any window shape?
He or she can install smart film on most flat glass surfaces. Curved or irregular windows may require custom cutting.
Is Smart Film safe for homes with children or pets?
Smart film uses low voltage and remains safe for homes with children or pets. He or she should handle smart film with care during installation to prevent damage or electrical issues.
What happens if air bubbles appear after installation?
He or she can remove air bubbles by gently lifting the film and smoothing it with a squeegee. Persistent bubbles may require reapplication. Proper cleaning before installation reduces bubble formation.
Can smart film be removed or replaced?
He or she can remove smart film without damaging the glass. Replacement follows the same installation steps. Careful removal ensures the window stays clean and ready for new film.