Is Shuifa Singyes Smart Glass Worth It for Homes and Offices
Learn more >


Ready to upgrade your windows? Installing Sympdlc Self-adhesive Smart Film feels easy and rewarding. This peel-and-stick solution works on almost any glass. You don’t need special tools or experience. Wondering how to install PDLC Dimming Window Film yourself? This installation guide gives you all the confidence you need. Save money and enjoy a smart window transformation right at home.
Test the dimming function after installation to ensure everything works correctly. Enjoy the benefits of privacy and energy savings!
Before you start your installation, it’s smart to gather everything you’ll need. Having the right tools and materials makes the process smoother and helps you achieve a professional finish. Let’s break down what you should have on hand.
Here’s a handy checklist for your installation:
1.Sympdlc Self-adhesive Smart Film (the star of the show)
2.Glass cleaning solution (choose a non-ammonia based option)
3.Lint-free cloths or microfiber towels
4.Squeegee (to smooth out bubbles)
5.Power supply (for the dimming function)
6.Wire strippers
7.Wire connectors
You might also want to grab nitrile gloves to keep fingerprints off the glass and film. If your window is high up, a ladder can help you reach safely. A rubber roller is great for pressing the film down evenly. Painters tape or low adhesive tape can help you mark your measurements without leaving sticky residue.
Tip: Double-check your tools before you begin. Missing something can slow you down or affect the final result.
Using quality materials and proper maintenance can make your self-adhesive pdlc film last for years. Here are some extras that boost your installation:
●Silicone adhesive sealant for sealing edges
●Packaging tape for securing wires or film during setup
●Wire mold or trim for a neat finish around electrical connections
●Electrical tester to check your power supply
●Soldering iron and electrical wire leads for advanced setups

Regular cleaning with ammonia-free products keeps your film looking clear and fresh. Avoid harsh chemicals to protect the smart film’s surface. If you want your installation to last, inspect the film occasionally for signs of wear. Minor repairs can extend its life and keep your windows looking sharp.
Note: High-quality smart films can last up to two decades with proper care. Investing in good materials pays off in the long run.
Ready to transform your windows with a high-tech solution? Let’s walk through the installation of Sympdlc self-adhesive PDLC dimming window film. This step-by-step guide will help you install smart film like a pro, even if this is your first DIY project. You’ll see how easy it is to upgrade your space with switchable glass products that go from clear to frosted in seconds.
A flawless installation starts with a spotless surface. Here’s how to get your glass ready for self-adhesive PDLC film:
1.Clean the glass with a non-abrasive glass cleaner or 99% isopropyl alcohol. Use a lint-free cloth to wipe away dust, grease, and fingerprints.
2.Dry the glass completely with a fresh lint-free towel. Any moisture can cause bubbles or poor adhesion.
3.Make sure your workspace is clean and dust-free. You want a dry installation process, so avoid water or chemical cleaners that could harm the film.
4.Give yourself enough room to move around the window. This makes it easier to handle the film and avoid accidental creases.
Tip: Never use ammonia or abrasive cleaners on the glass or smart film. Stick with anhydrous alcohol for the best results.
Getting the right fit is key for a seamless look. Here’s how to measure and trim your self-adhesive PDLC film:
●Measure the interior dimensions of your windows carefully. Write down the height and width.
●Use a sharp utility knife or professional cutting machine for specific instructions for trimming. Scissors work for small adjustments, but a clean edge is best for a neat finish.
●Lay the film flat and double-check your measurements before you start trimming.
Note: Take your time with trimming. A precise cut means your smart privacy film will look custom-made.
Now comes the fun part—installing the self-adhesive PDLC dimming window film. Here’s how to get it right:
1.Test the placement by holding the film up to the window. Use painter’s tape as a hinge to check alignment.
2.Peel back a few inches of the backing from the top of the film. Line up the edge with the top of your window.
3.Stick the exposed part of the film to the glass, then slowly peel away more backing as you press the film down.
4.Work from top to bottom, smoothing as you go. If you need to reposition, gently lift the film and try again.
Alert: Avoid touching the adhesive side with your fingers. This keeps the film clear and bubble-free.
Air bubbles can spoil the look of your smart film, but they’re easy to fix:
1.Start in the center of the film and push outward with a soft-edge squeegee.
2.Use firm, even strokes to press out air and water toward the edges.
3.For stubborn bubbles, lift the film gently and remove any dust with adhesive tape before reapplying.
Tip: Don’t rush this step. Take your time to get a flawless finish on your self-adhesive PDLC film.
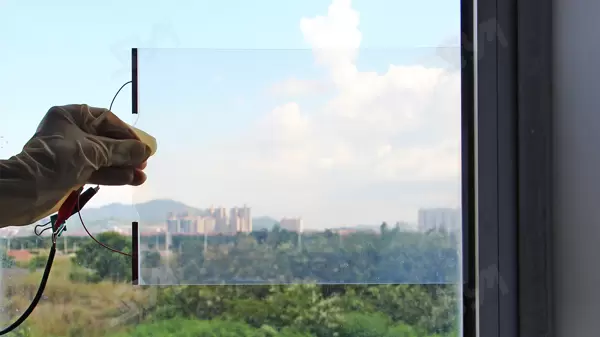
To unlock the magic of your PDLC dimming window film, you need to connect it to power:
●Each smart film panel comes with pre-wired busbars and protruding wires.
●Connect these wires to the transformer, which links to your power supply.
●The power control unit converts high voltage to the safe, low voltage needed for the film’s liquid crystals.
●If you’re not comfortable with wiring, ask a licensed electrician for help. Always follow local electrical codes.
Note: Proper wiring is essential for safety and for your home automation system to control the film with a voice command.
You’re almost done! Now, test your installation:
1.Turn on the power supply and use the switch to activate the smart film.
2.Watch as the film shifts from clear to frosted. This is the signature effect of PDLC dimming window film.
3.Check for any missed bubbles or loose edges. If you spot any, smooth them out with your squeegee.
4.Let the film cure for 24–72 hours before cleaning or touching it. This ensures the adhesive bonds fully.
Tip: Enjoy your new smart windows! You’ve just completed a DIY project that adds privacy, style, and home automation to your space.
With these steps, you can install self-adhesive PDLC film on almost any glass surface. Whether you want privacy film for your bathroom, smart film for your office, or a high-tech solution for your living room, this installation process works for all. The universal compatibility of Sympdlc self-adhesive PDLC film means you can upgrade windows, doors, or even glass partitions. This is a smart film that fits your life—perfect for renters, homeowners, and anyone who loves a good DIY project.
Sealing the edges of your smart film is a simple step that can make a big difference in the long run. When you want privacy on demand, you need to keep moisture out. Use a neutral-cure silicone sealant around all edges. This helps prevent moisture from sneaking in and keeps your film working at its best. Only use certified silicones for this job. If your installation is in a bathroom or kitchen, waterproof connectors for busbars and leads are a smart move. This extra step protects your retrofit and keeps the quality high for years.
Tip: A good seal means your privacy solution stays strong, even in humid spaces.
Even the best DIYers can run into trouble. Here are some mistakes to watch out for when installing your PDLC film for privacy:
●Rushing the cleaning step. Any dust or grease can ruin the quality of your privacy film.
●Skipping the edge sealant. This can let moisture in and affect your privacy on demand.
●Not leaving enough wiring space. Tight wires can cause electrical failure and impact your retrofit.
●Using the wrong cleaning products. Ammonia or abrasives can damage the film and reduce privacy.
Take your time and double-check each step. Your privacy and the quality of your installation depend on it.
Sometimes, things don’t go as planned. Don’t worry—most problems have simple fixes. Here’s a quick table to help you troubleshoot:
| Issue | Solution |
|---|---|
| Bubbles during installation | Pause, use a squeegee to push air out, check for dust or debris. |
| Bubbles after installation | Film must be replaced if unsatisfactory. |
| Uneven appearance when powered | Caused by residue or uneven bonding; cannot be fixed after installation. |
| Dust control | Stop installation if dust is a problem. |
| Electrical failure | Make sure there’s enough wiring space. |
| Moisture ingress | Seal edges and prep frames to block moisture. |
If you see bubbles while installing, stop and use a squeegee. Push air out in one direction. If you notice bubbles after the film cures, you may need to replace that section. For uneven appearance, check for residue before you finish. Always aim for quality, especially when you want privacy that looks great. If you’re retrofitting an older window, take extra care with cleaning and sealing. That way, you get privacy on demand and a finish that lasts.
Remember, a little patience goes a long way. Your privacy and the quality of your smart film depend on careful installation.
Keeping your Sympdlc Self-adhesive Smart Film clean is simple, but a few smart habits make all the difference. This film is built to last, so gentle care goes a long way. Here’s how you can keep your smart windows looking crystal clear:
●Use a soft, lint-free microfiber cloth for everyday cleaning.
●Wipe with a mild, ammonia-free glass cleaner or diluted isopropyl alcohol.
●Avoid high-pressure washing and never soak the film with water.
●Prevent water from sitting on the edges or seams for too long.
●Stay away from harsh chemicals that could damage the adhesive or sealant.
Here’s a quick guide to what’s safe and what’s not:
| Cleaning Product | Status | Notes |
|---|---|---|
| Microfibre Cloth | ✅ Recommended | Must be lint-free. |
| Water (Damp) | ✅ Recommended | Use distilled water if necessary. |
| Ammonia Cleaners | ❌ PROHIBITED | Can chemically attack the surface. |
| Soaking / Spraying | ❌ PROHIBITED | Avoid direct spraying to prevent electrical issues. |
| Abrasive Pads | ❌ PROHIBITED | Will scratch the coating permanently. |
Tip: Always clean gently. A soft touch keeps your smart film looking new and working perfectly.
Sympdlc’s Self-adhesive Smart Film is designed for durability and eco-friendly living. With the right care, you can enjoy up to 10 years of performance. Here are some easy ways to help your smart film last:
●Seal the edges with neutral cure silicone to block out moisture.
●Check the sealant every year and replace it if you see any gaps.
●Keep sharp objects away from the film to avoid scratches or peeling.
●Protect the film from extreme heat by using exterior shades if needed.
●Inspect the wiring and connections regularly to make sure everything works smoothly.
●If you notice any peeling or bubbling, fix it right away to prevent further damage.
●For large installations, consider a yearly professional checkup.
🌱 Sympdlc’s smart film uses just 5W/m², making it a sustainable choice for your home or office. With a little care, you’ll enjoy privacy, style, and energy savings for years to come.
Installing Sympdlc Self-adhesive Smart Film is simple and rewarding. You get privacy, style, and energy savings in one smart upgrade. Just follow the steps for a flawless finish and years of reliable use. Check out these top benefits:
| Benefit | Description |
|---|---|
| Energy Savings | Blocks heat and UV, lowers cooling costs. |
| Customization Options | Fits your space with size, color, and smart features. |
| Smart Integration | Works with home automation for easy control. |
Keep your windows clean with a soft cloth and mild cleaner. Enjoy your new smart space every day!
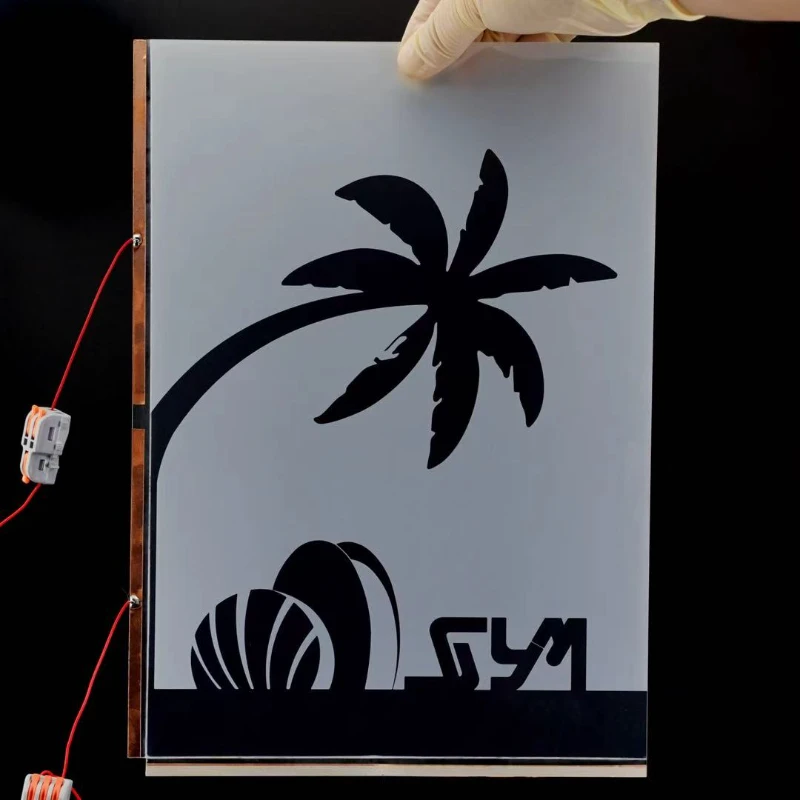
PDLC dimming window film uses Polymer Dispersed Liquid Crystal technology. This film lets you switch glass from clear to frosted with a button. PDLC gives you privacy and light control. It works on many glass types and is easy to install.
You can install PDLC film on almost any glass window. PDLC sticks to clear float, tempered, laminated, and Low-E glass. It fits homes, offices, and even rental spaces. PDLC is flexible and works for many projects.
PDLC film changes when you turn on the power. The liquid crystals inside PDLC align and make the glass clear. When you turn off the power, PDLC scatters light and turns frosted. You get instant privacy with PDLC.
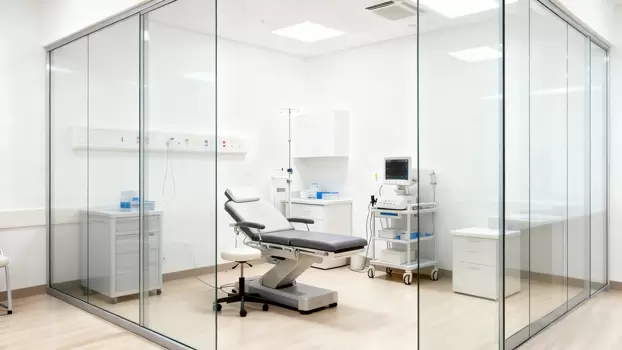
PDLC film is safe for humid areas like bathrooms and kitchens. PDLC blocks moisture when you seal the edges. PDLC also contains fumes and keeps your space private. PDLC works well in wet environments.
Cleaning PDLC film is simple. Use a soft microfiber cloth and mild, ammonia-free cleaner. PDLC stays clear with gentle care. Avoid harsh chemicals and don’t soak PDLC with water. PDLC lasts longer with regular cleaning.
PDLC dimming window film gives you privacy, style, and energy savings. PDLC is easy to use and maintain. PDLC fits your life and your windows.
| PDLC Film Benefits | Description |
|---|---|
| Privacy | PDLC switches glass from clear to frosted. |
| Energy Savings | PDLC blocks UV and heat. |
| Easy Installation | PDLC uses peel-and-stick application. |
| Versatile Use | PDLC fits homes, offices, and rentals. |