Why Choose a Car PDLC Smart Film Manufacturer for Automotive Smart Glass Solutions?
Learn more >


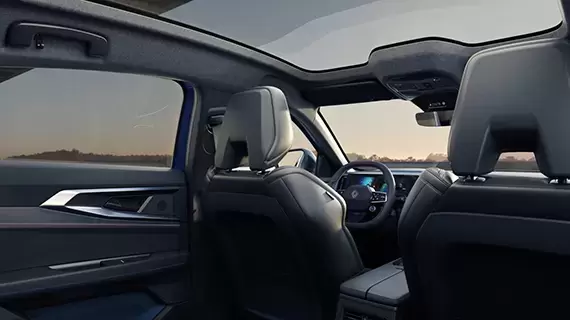
Smart technology changes how people protect their vehicles. When someone applies professional auto modification smart film to a car window, they get more than just a cool look. This premium tint helps block UV rays, adds privacy, and cuts down on glare. The right installation method keeps each window crystal clear and strong. Many drivers value UV protection because it shields both passengers and interiors. Top-quality film uses advanced technology for long-lasting UV defense. Teamwork matters here, since handling a window and wiring safely often works best with two people. The right tools, careful planning, and a focus on premium results make every window stand out.
●Smart film offers UV protection, privacy, and glare reduction, making it a valuable upgrade for car windows.
●Proper preparation, including cleaning windows and gathering the right tools, ensures a smooth installation process.
●Accurate measurements and precise cutting are essential for a perfect fit and professional-looking results.
●Teamwork and controlled conditions help prevent creases, bubbles, and misalignment during installation.
●Regular cleaning and maintenance extend the life of the tint and keep the car looking sharp.
Before anyone starts working on car windows, they need the right tools for a smooth installation. Professional installers often reach for specialized kits and equipment. Here’s a quick list of essentials:
●SOLYX Window Film Installation Tools
●T105 - 6" Triumph Soft Grip Scraper
●T101 - 8" Blue Max Squeegee Blade
●T100 - Complete Set of Professional Tools
●SX-002 Complete Window Film Application Kit
●SX-001 Basic Window Film Application Kit
●T112 - White Flexible Edge Squeegee, 6" wide
●T111 - Complete Blue Max Professional Squeegee, 8" wide
●T110 - 12" wide Professional Stainless Steel Glass Cleaning Squeegee
●T108 - Pro Cutter Knife - Auto-lock
●T107 - 12-Point Stainless Steel Snap Off Blades (50 pack)
●T106 - 6" Stainless Steel Triumph Scraper Blades (25 pack)
He or she should always use premium-quality tools and materials. These help prevent scratches and ensure the tint sits perfectly on every window.
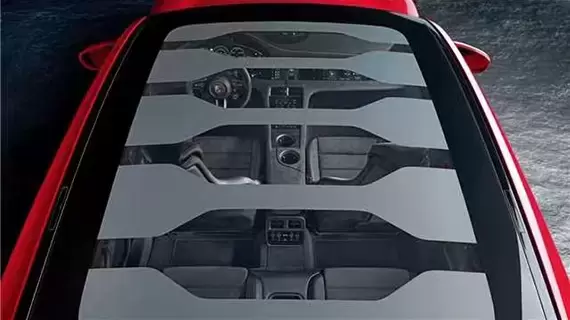
Choosing the right professional auto modification smart film makes a big difference. Experts look for installation quality, the materials used, and the reputation of the installer. Years of experience, proper licensing, and positive reviews also matter. Investing in professional-grade films brings long-term benefits. These include reduced heat absorption, lower air conditioning demand, and better protection for the interior from UV rays. High-quality tint also means better durability and more customization options for any car. Premium technology in automotive window film gives drivers privacy and uv protection while keeping the window looking sharp.
Tip: Always choose a pre-wired smart tint sheet for easier installation and reliable performance.
Preparation sets the stage for a flawless result. He or she should follow these steps:
1.Site Assessment: Check the window and frame for any damage or dirt.
2.Surface Preparation: Clean car windows with low-lint towels to remove dust, oils, and residues.
3.Workspace Preparation: Find a flat surface to work on and keep fans off to avoid dust.
4.Installation: Apply the professional auto modification smart film to clean glass and connect it to a low-voltage power supply.
Teamwork helps prevent creasing and damage during installation. Electrical wiring should always be handled by a qualified electrician for safety and to protect the tint’s smart features.
Accuracy matters most when measuring a window for smart tint. He or she should always double-check each measurement before picking up the scissors. The industry standard suggests measuring the car window three times. This helps avoid mistakes and keeps the tint from being too short or too long. A small error can lead to wasted film or a poor fit.
1.Start by measuring the width and height of the window at the center.
2.Measure again at the top and bottom to check for any curve or taper.
3.Repeat the process once more to confirm the numbers match.
Tip: For the best results, he or she can send the correct measurements to the manufacturer. Many companies offer professional laser cutting, which gives a perfect fit for every window.
Cutting the tint takes patience and the right tools. He or she should avoid using a razor knife, since it can cause the film to split or leave a rough edge. Stainless steel or titanium scissors work best for trimming. If the tint needs a custom shape, a steady hand helps keep the lines clean.
●Always cut the tint slightly larger than the window. This gives room for final adjustments.
●Use an acid-free adhesive on the cut edges. This step prevents splitting or delamination over time.
●Make sure the glass is spotless and dry before applying the tint. Dirt or moisture can cause bubbles and poor adhesion.
●Align the tint carefully with the window edges. Misalignment is a common mistake and can ruin the look.
Note: Many professionals recommend working with a partner. Teamwork helps keep the tint smooth and prevents creasing.
He or she should remember that a clean, dry window is key for strong uv protection and a flawless finish. Taking time with these steps ensures the tint will block uv rays, reduce glare, and protect the car’s interior for years.
He should always start with a spotless window before installing tint. A clean surface helps the tint stick better and prevents bubbles or peeling later. Professionals recommend using an ammonia-free glass cleaner. This type of cleaner protects the tint and avoids any chemical damage. She can spray the cleaner directly on the window and wipe it with a soft, lint-free microfiber towel. These towels remove streaks and do not leave scratches. For quick touch-ups, a waterless car wash spray works well. Some installers also use HydroView ceramic glass cleaner. This product adds a hydrophobic layer, making the window even easier to clean in the future.
Tip: Always clean both the inside and outside of the window. Even a small spot of dirt can ruin the look of the tint.
Dust and debris can hide in corners and along the edges of the window. He should check these areas carefully. Using a microfiber towel, he can gently wipe away any particles. She might also use a soft brush to reach tight spots. If dust stays on the window, it can cause bubbles under the tint. These bubbles make the film look uneven and can lead to peeling over time.
●Wipe the window frame and seals.
●Check for pet hair or lint.
●Use a clean towel for each step.
After cleaning, he should inspect the window under good lighting. She can run her hand over the glass to feel for any rough spots. If she finds sticky residue or marks, she should clean them again. The window must feel smooth and look clear. Any leftover dirt or oil can stop the tint from sticking well. A perfect surface means the film will last longer and look professional.
Note: Taking time with this step saves money and effort. A clean window helps the tint perform at its best and keeps the car looking sharp.
He should start by positioning the smart tint on the window. She needs to work with a partner to avoid creasing and misalignment. Teamwork makes the tinting process smoother and helps prevent mistakes. The tint film must be applied in shaded conditions. This step keeps the adhesive from drying too quickly and stops distortion. The ideal temperature for window tinting sits between 40 and 80°F. If the temperature rises above 90°F, the tint film dries fast and creates wrinkles or air pockets. High humidity slows the drying process and can cause bubbles. He should always check the weather before starting the installation.
●Lay the tint film flat against the window.
●Align the edges with the window frame.
●Use gentle pressure to keep the tint smooth.
●Avoid stretching the tint film.
Tip: Premium window tinting technology works best when applied in a controlled environment. He should never rush the tint installation.
She needs to smooth out bubbles and wrinkles right after applying the tint. He can use a professional squeegee to press the tint film against the window. Start from the center and move outward. This method pushes air and moisture away from the tint film. She should check for bubbles along the edges and corners. If she finds any, she can use a soft cloth or squeegee to flatten them. He must avoid using sharp tools that could damage the premium tint.
●Work slowly and check each section.
●Use overlapping strokes with the squeegee.
●Keep the window clean during the tinting process.
Note: Premium window tint installation requires patience. Rushing can lead to bubbles and wrinkles that ruin the look.
The installer should secure the edges of the tint film to the window frame. The installer can use a premium adhesive to keep the tint in place. The tint installation needs careful attention to detail.The installer should check that the tint sits flush with the window edges. Now, the smart film wiring comes next. Only a qualified electrician should handle the wiring. This step ensures safety and keeps the smart tint technology working as intended. The installer should never attempt wiring without professional help.
The installer should inspect the window after the tinting process. The installer can check for any loose edges or missed spots. Premium window tint lasts longer when installed by professionals. The tint film protects the car interior and keeps the windows looking sharp.
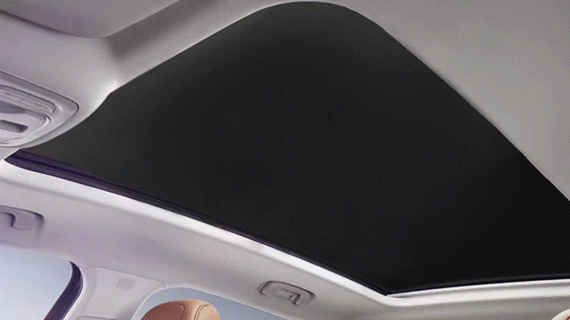
He should test the smart tint technology after installation. She can connect the wiring and check if the tint changes as expected. He needs to look for any spots where the tint does not respond. She should inspect the window for clear transitions between tinted and clear modes. If the tint works well, the car gains privacy and UV protection. He can ask a partner to help check each window. She should make sure all controls function smoothly.
He should inspect the tinted windows for any loose edges or bubbles. She needs to clean the windows with a mild soap and water solution. He must avoid harsh chemicals or abrasive materials. She can use a soft cloth or a microfiber towel for cleaning. Regular cleaning keeps the tint looking sharp and prevents dirt buildup. He should park the car in shaded areas or use a sunshade to protect the windows from harsh sunlight. She might use a car cover for long outdoor parking.
●Use a mild soap and water solution with a soft cloth.
●Avoid harsh chemicals and abrasive cleaning materials.
●Clean regularly to prevent dirt and grime buildup.
●Choose a tint-safe cleaner and avoid ammonia-based products.
●Park in shaded areas or use a sunshade for protection.
Note: Regular maintenance extends the life of the tint and keeps the car looking fresh.
| Installation Method | Benefits/Drawbacks |
|---|---|
| Professional | High quality, warranty, legal compliance, long-lasting performance |
| DIY | Lower cost, but risks of defects, potential voided warranties, and extra costs if reinstallation is needed |
Professional installation offers expert labor and legal compliance. Premium films provide superior performance and longevity, which justifies the higher cost. DIY methods may lead to extra expenses if installation fails. He should consider the value of professional work for lasting results.
Installing smart film on a car window takes careful planning and teamwork. He or she should measure the window, create a template, cut the tint, and install the pre-wired film. Using premium materials and working with a partner helps prevent creasing and damage. Regular cleaning and parking in shaded areas keep the window looking sharp. He should inspect the windows for bubbles or scratches and use tint-safe cleaners. If problems appear, she can ask a professional for help. Smart tint technology offers privacy and UV protection, making every window a valuable upgrade.
Most professional teams finish in two to four hours. The time depends on the number of windows and the car model. He or she should plan for extra time if wiring needs special attention.
DIY kits exist, but he or she may struggle with wiring and alignment. Many people find that professional installation gives better results and avoids costly mistakes.
No, smart film does not block window movement if installed correctly. He or she should always check that the film does not catch on seals or edges.
Use a soft microfiber cloth and mild soap. He or she should avoid ammonia-based cleaners and rough sponges. Regular gentle cleaning keeps the film clear and scratch-free.