7 Tips for Choosing Customizable Color Smart Film PDLC for Your Project
Learn more >


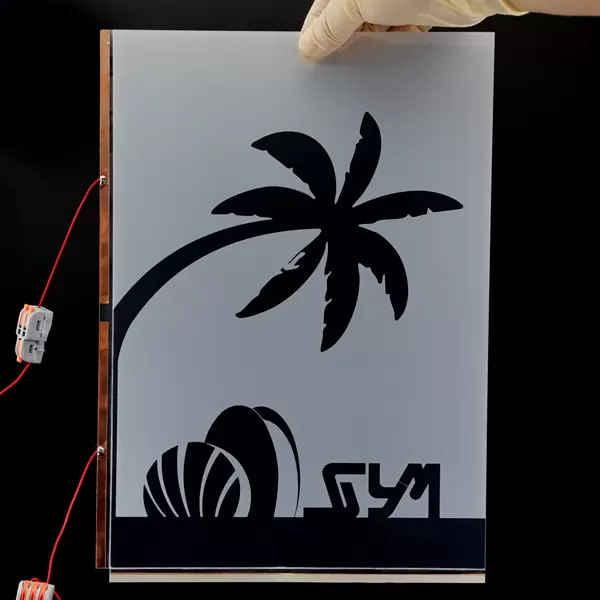
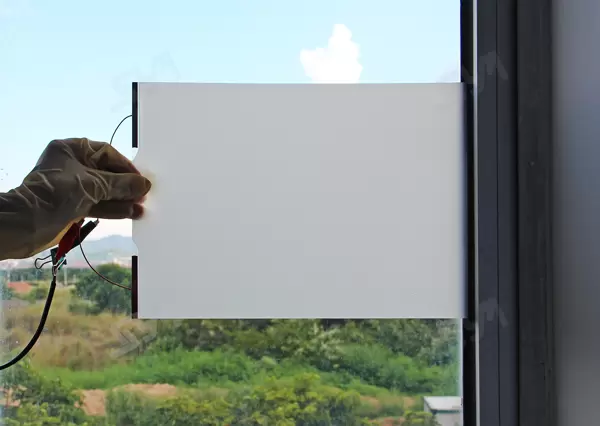
Yes, Smart Film can be installed on existing glass without the hassle of replacement. Homeowners and business owners love how easy and flexible Smart Film Installation feels. Shuifa Singyes New Materials brings advanced PDLC technology to the table with Smart Film, making privacy and light control simple. Take a look at the main advantages people see compared to swapping out glass:
Advantage | Description |
Cost-effective retrofitting | Transform existing glass without replacement |
Relatively simple installation | Can often be installed within a day |
Preservation of existing structures | No need for major construction |
Shuifa Singyes New Materials Smart Film uses advanced PDLC technology, making Smart Film Installation a straightforward upgrade for homes and businesses. People often wonder how the process works and what tools they need. Let’s break it down step by step.
Getting ready for Smart Film Installation starts with gathering the right tools. Most homeowners and business owners can handle the prep work themselves. Here’s what they need:
· Smart film roll
· Glass cleaner
· Lint-free microfiber cloths
· Straight edge or ruler
· Squeegee or application card
· Electrical tape and insulated connectors
· Transformer or power supply unit
Before starting, they should inspect the glass surface. It must be clean, dry, and free from scratches or debris. Measuring the glass accurately helps avoid overlapping or gaps. Creating a dust-free environment makes the installation smoother. Some people use a vacuum or air purifier to keep the area clean.
Tip: Always use neutral cleaning solutions and lint-free cloths. This prevents streaks and ensures the film bonds well.
Smart Film Installation follows a clear sequence. Each step matters for a flawless finish.
1. Clean the glass thoroughly and dry it.
2. Apply the film to the glass, starting from the top edge.
3. Use a squeegee to press the film and remove air bubbles.
4. Trim Use TOSHIBA GE83 and GE381 series neutral silicone sealant to seal the edges of the smart film.
5. Connect the electrical system using insulated connectors and tape.
6. Test the film by powering it on and checking its switch between transparent and frosted states.
Window Type | Estimated Time |
Single small window (2x2 feet) | 30 to 60 minutes |
Standard residential window (3x5 feet) | 1 to 2 hours |
Large office window or glass wall | 3 to 5 hours |
Full-house installation (multiple windows) | 1 to 2 days |
Commercial office installation | Several days |
Most installations bond the film to the interior face of the glass. The process works best on smooth surfaces, making retrofitting easy.
Proper alignment and bonding are crucial for Smart Film Installation. People need to pay attention to these details:
1. Clean the glass with water and alcohol to remove dust.
2. Align the film edge with the top of the glass and press down to fix it.
3. Slowly peel away the protective layer, letting the film adhere.
4. Use a rubber roller or squeegee to eliminate air bubbles and ensure full contact.
Self-adhesive technology allows for a peel-and-stick method. Wet application methods let users reposition the film during installation. Professional installers often use squeegees to make sure the adhesive layer bonds completely.
Common issues include air bubbles, adhesion problems, and overstretching. Air bubbles can affect the look and attachment. Pressing firmly and using high-quality adhesive helps prevent peeling. Avoid stretching the film too much, as it can deform and reduce performance.
Note: Taking time during alignment and bonding pays off. A well-installed smart film looks seamless and works perfectly.
Smart Film Installation transforms existing glass into a high-tech surface without replacement. Shuifa Singyes New Materials Smart Film makes the process accessible, whether someone chooses DIY or professional help.
People often wonder if their glass is compatible with smart film. The good news is that smart film works with a wide range of glass types. Here are some of the most common options:
1. Switchable Laminated Glass: This type is perfect for high-traffic areas, bathrooms, and hospitals. It has the switchable layer sealed between two pieces of glass, which boosts both safety and durability.
2. Insulated Smart Glass: Insulated glass units, or IGUs, offer great thermal performance. When made with switchable glass, they combine insulation with privacy and light control.
3. Any Type of Glass: Almost any glass can become switchable through lamination. The process sandwiches smart film between two layers of laminated and tempered glass, making it flexible for many uses.
Homeowners use smart film on windows, sunrooms, and doors. Businesses install it on office partitions, conference rooms, and storefronts. Even automotive glass can benefit from this technology. Smart Film Installation brings privacy and style to both homes and commercial spaces.
For smart film to stick well, the glass surface needs to meet certain conditions. Cleanliness matters most. Here’s what installers check before starting:
· The work area must be clean and free of dust.
· The glass should have no oil, fingerprints, or residue.
· Scratches, lint, and pet hair can cause permanent blemishes if trapped under the film.
· A smooth, undamaged surface helps the film bond evenly.
Tip: People should always wipe the glass with a lint-free cloth and check for any tiny particles before applying the film. Even small bits of dust or hair can show up once the film is in place.
While smart film suits most glass, a few exceptions exist. Some situations make installation tricky or not recommended. The table below highlights these cases:
Exception Type | Description |
Improper Installation | Warranty does not cover poor installation practices. |
Environmental Conditions | Using the film outside design standards can void the warranty. |
Damage from Vandalism | Accidents or vandalism are not covered by warranty. |
Incorrect Measurements | Providing wrong measurements can lead to warranty issues. |
Power Surges | Physical damage from power surges is not covered. |
Field Trimming | Cutting the film on-site is not allowed; only factory trimming works. |
Installers should avoid placing smart film on cracked, chipped, or heavily textured glass. They should also follow manufacturer guidelines for measuring and cutting. If unsure, they can ask a professional for advice.
Smart Film Installation works best when the glass meets these compatibility standards. With the right preparation, almost any glass surface can become smart and stylish.
Smart film gives users instant control over privacy and natural light. With a simple switch or app, they can change the glass from clear to frosted in milliseconds. This feature stands out compared to traditional window treatments. Curtains and blinds need manual adjustment and often block out too much light. Smart film lets people enjoy sunlight while keeping their space private. The technology uses an electric current to shift liquid crystals, so the glass can go from transparent to opaque on demand. This flexibility makes smart film a modern solution for homes, offices, and even cars.
Smart film not only protects privacy but also keeps rooms bright and welcoming. People can create the perfect atmosphere for work, relaxation, or entertaining guests.
Smart film does more than just control light. It also blocks up to 99% of harmful UV rays and 87% of heat. This protection helps keep furniture, flooring, and artwork from fading. During hot summer days, smart film can reduce solar heat gain by as much as 80%. Many buildings see a drop in cooling costs by 10% to 30% after installation. Indoor temperatures stay more stable, which means less strain on air conditioning systems and lower energy bills. Smart film helps create a comfortable and energy-efficient environment.
· Blocks 99% of UV rays
· Reduces heat by up to 87%
· Cuts cooling costs by up to 30%
· Keeps indoor temperatures steady
Smart film brings both style and function to any space. It offers total privacy control with switchable states and does not require a lengthy installation process or much maintenance. When opaque, the film can even serve as a high-quality projection screen. Offices use smart film to create open, visually connected workspaces that still offer privacy when needed. Homes look brighter and more modern after Smart Film Installation. The film’s sleek design fits with any décor and makes rooms feel larger.
Upgrade Feature | Benefit |
Switchable privacy | On-demand confidentiality |
Projection capability | Doubles as a screen for presentations |
Glare reduction | Less eye strain, more comfort |
Smart home integration | Control with apps or automation systems |
Smart film works with smart home systems like Crestron and Lutron. Users can set scenes where the film changes along with lighting or other devices. This integration gives them full control over their environment, whether at home or in the office. Smart film offers a cost-effective upgrade with minimal disruption compared to replacing glass.
Smart film installation starts with the glass surface. They need to make sure the glass is smooth and spotless. Dust, oil, or scratches can cause adhesive failure, reduced clarity, and weak bonding at the edges. Moisture trapped under the film leads to bubbles and peeling. Installers always recommend cleaning with a lint-free cloth and checking for any particles before applying the film. If the glass has texture, curves, or damage, smart film may not stick properly. People should avoid installing on these surfaces. A clean, flat window gives the best results.
A well-prepared surface means the film stays clear and secure for years. Skipping this step can lead to visible dust, poor adhesion, and costly repairs.
The quality of installation makes a big difference. Professional installers use advanced tools and techniques to ensure a flawless finish. They avoid common mistakes like uneven application or improper adhesion. Many professionals offer warranties, giving peace of mind. DIY installations can be tempting, but they often take longer and may lead to costly errors. Large or complex spaces, such as glass partitions or commercial windows, benefit from expert help. Wiring and automation also require skilled hands.
Installation Type | Pros | Cons |
Professional | Reliable, quick, warranty | Higher upfront cost |
DIY | Flexible, cost-saving | Risk of mistakes, time-consuming |
Professional installers can manage visible edges and wiring for a clean look. DIY projects may struggle with these details, affecting the final appearance.
Smart film needs minimal maintenance compared to traditional window treatments. People should clean the film gently with mild soap and water, avoiding abrasive materials. Routine inspections help spot cracks, scratches, or peeling early. Sealing the edges with neutral cure silicone protects against moisture. Regularly checking and replacing sealant prevents water damage. Adding exterior shades or tinting can minimize UV exposure and extend the film’s life.
· Clean periodically to maintain clarity.
· Inspect for damage and address issues quickly.
· Seal edges to guard against moisture.
· Avoid harsh cleaners and rough cloths.
Smart film offers a simple upkeep routine. Unlike blinds or curtains, it has no mechanical parts to maintain. People enjoy a modern look with less hassle.
Choosing between professional and DIY installation for smart film depends on budget, skill level, and project size. Each option brings unique advantages and challenges.
· Saves money by avoiding labor costs.
· Offers flexibility to work at your own pace.
· Gives a sense of accomplishment from completing the project.
DIY Installation Cons:
· Risk of mistakes like air bubbles or poor alignment.
· Challenges with electrical wiring.
· No warranty coverage for DIY installations.
· Limited access to professional tools and expertise.
Professional Installation Pros:
· Skilled installers ensure a flawless, seamless application.
· Saves time as professionals work efficiently.
· Includes warranty protection for the installation.
· Safe and proper integration of electrical wiring.
Professional Installation Cons:
· Higher upfront costs compared to DIY.
· Need to coordinate schedules with installers.
· Less personal control over the process.
A table can help compare the two options at a glance:
Installation Type | Pros | Cons |
DIY | Budget-friendly, flexible schedule, personal satisfaction | Risk of errors, time-consuming, no warranty |
Professional | Expert quality, fast, warranty included | Higher cost, scheduling required, less control |
Some projects call for professional expertise. Large glass walls, irregular window shapes, or installations that require complex wiring often benefit from a pro’s touch. People who feel unsure about their DIY skills or want a guaranteed result should consider hiring an expert. Professionals also understand how local climate can affect installation, which helps ensure durability and performance. Choosing a professional makes sense when the project feels overwhelming or when warranty protection matters.
For those who enjoy hands-on projects, DIY installation can be rewarding. Here are some tips for success:
1. Prepare the workspace on a clear, dry day with steady light.
2. Gather all necessary tools: smart film, squeegee, utility knife, spray bottle with alcohol, microfiber cloths, and a straight-edge ruler.
3. Clean the glass thoroughly to remove every speck of dust or smudge.
4. Use a squeegee from the center outward to remove air and moisture.
5. Avoid installing under direct midday sunlight to prevent rapid drying.
6. Use TOSHIBA GE83 and GE381 series neutral silicone sealant to seal the edges of the smart film.
Taking time with each step helps achieve a smooth, professional-looking finish—even for first-time installers.
Smart Film offers a simple upgrade for existing glass. Homeowners and business owners enjoy privacy, UV protection, and modern style without replacing windows. Shuifa Singyes New Materials Smart Film stands out for easy installation and reliable performance. Case studies show Smart Film costs less and handles easier than smart glass. People should check their glass for compatibility and consider this smart solution. The table below highlights key differences:
Feature | Smart Glass | Smart Film |
Installation | New glazing needed | Applied to old glass |
Cost | Higher | Lower |
Handling | Complex | Easy rolls |
Smart Film makes upgrading effortless and valuable.